Website Menus
A website menu is a list of links to different pages and sections of a website.
It is a key part of your site's navigation system, typically found in the header.
Tip 💡
Menus are best added to templates so they they can be used by all pages sharing the template. However a menu can be added to any page or template.
Your pages should be created first so that links that you create on your menu(s) have targets.
📺For a video tutorial on how to create a website menu, click here.
In this article
Types of menu links
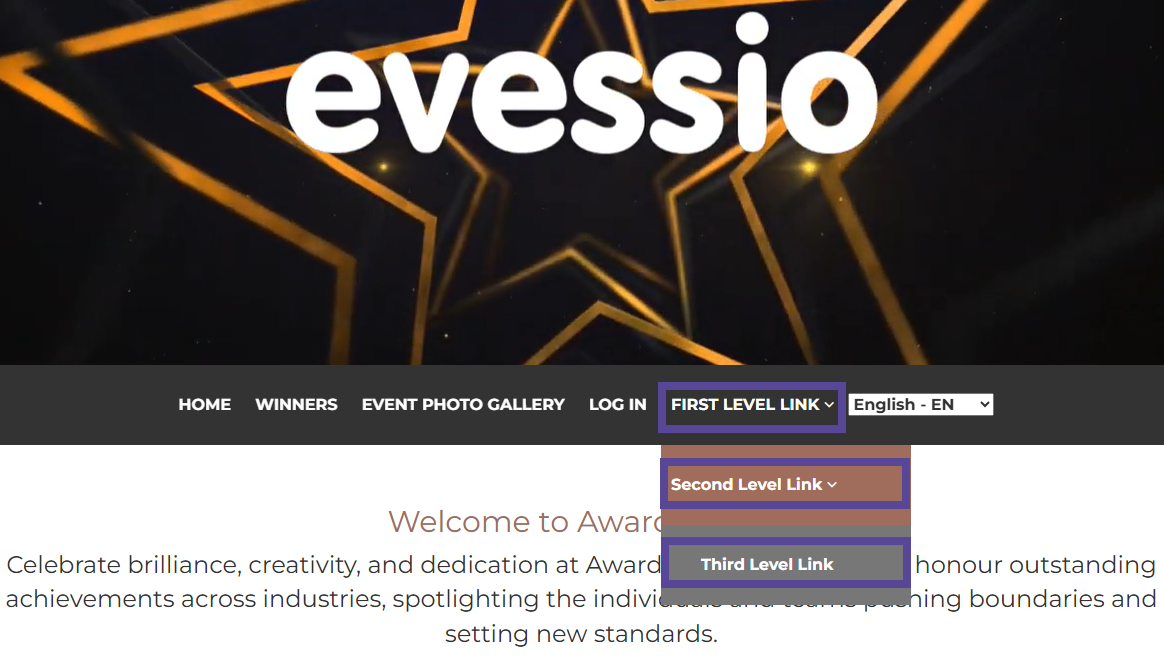
You can easily create multiple levels for your menus with a dropdown effect, allowing you to group pages within your navigation menu.
Tip 💡
Evessio supports up to 3 levels, but as a best practice its advisable to limit your menus to no more than 2 levels.
| Type of link | What it does |
|---|---|
| First Level Link | Primary menu item, that can link directly to a page, or open a 'sub-menu' of second level links. |
| Second Level Link | Menu items that are nested into first level links, acting as a 'sub-menu'. You can edit the first level link to add second level links to it. |
| Third Level Link | Menu items that are nested inside your second level links, acting as a further 'sub-menu'. You can edit the second level link to add third level links to it. |
Creating your menu
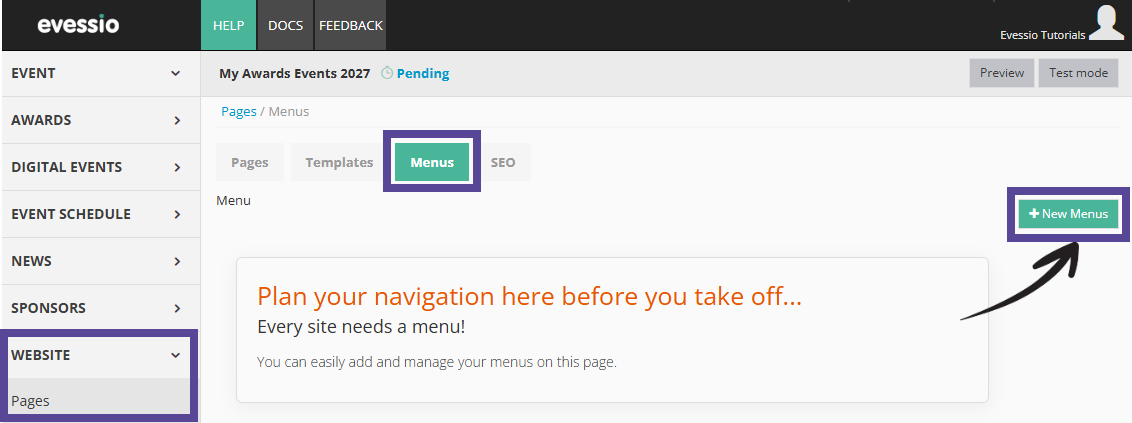
To begin creating your menu, go to Website > Pages, and select the Menus tab at the top of the page, and click on +New Menu.
In the new window, give your menu a name, and choose if your menu name will be displayed (this is rare).
Next, select if you would like your logo to appear on your menu.
If you do choose to use your logo, upload the image, and choose the logo position, if it should be on the right or left side of your menu items. You can also choose to link your logo to a page, such as your event homepage.
After selecting the menu height (optional), you can choose how you would like your menu to be aligned, i.e. if the menu links are aligned to the left, right or centre.
Next, you can choose if you will customise the colours. To do so, tick the box Customise menu colours?, and choose your preferred colours. If you do not customise your menu colours, the menu will use the colour palette from your Theme Settings.

Adding links to your menu
Once you have completed the configuration of the 'look and feel' of your menu, you can then begin to add menu links.
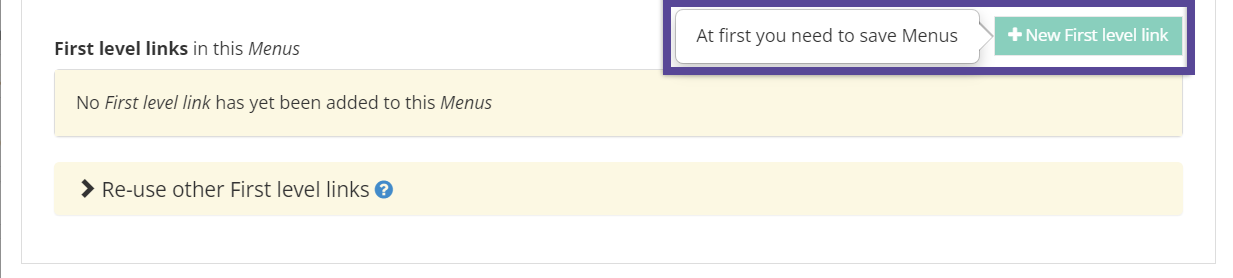
To add a first level link click, +New First Level Link.
Note 🗒️
Before you can add any links to the menu, you need to save it first. Once saved, click on the menu to re-enter the setup. You will then be able to add links.
In the new window, give your link a name (this will be the name of the button on your menu), and where you would like it to link to.
If you want to connect it to one of your Evessio web pages, click on the area labelled Internal Link, and choose which of your already-created pages this menu item links to.
If you want to connect it to a page outside of Evessio, tick the box Is external link, and add the URL of your chosen destination.
Finally, you can choose to add an icon. To do so, tick the box Add icon?, and choose from the available icons. If you prefer, you can upload a custom icon.
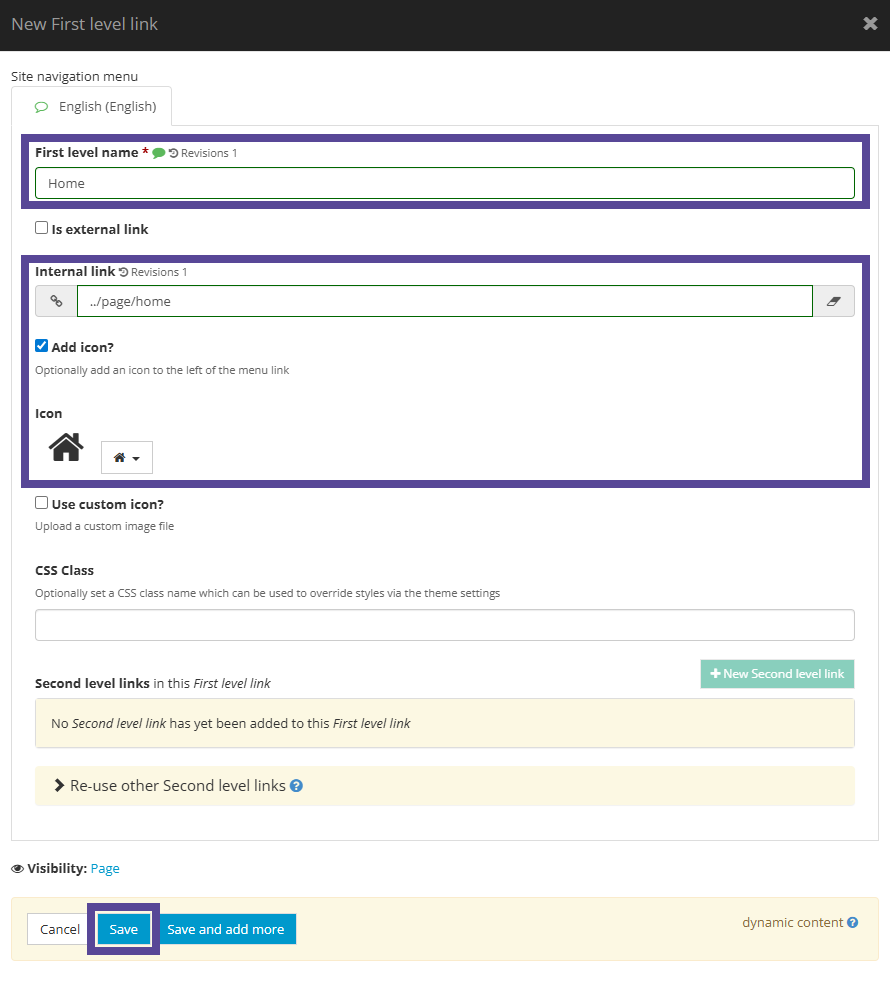
When you are done, click Save.
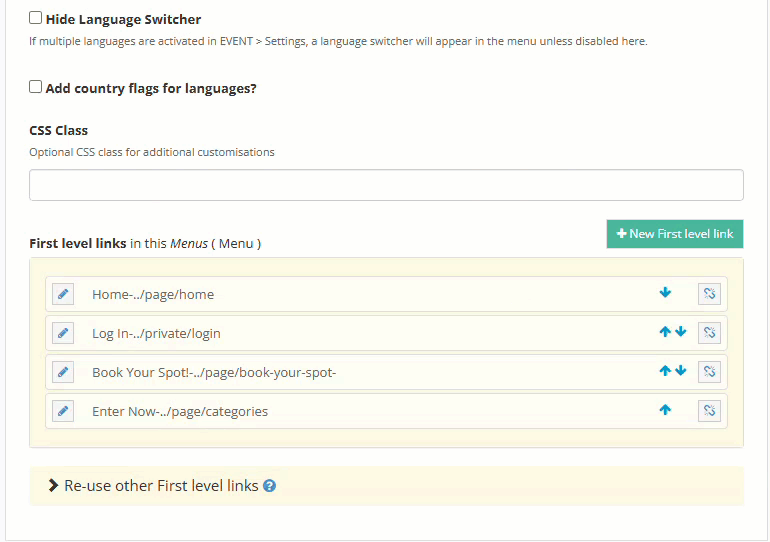
If you would like to add a sub menu of second level link(s) click, +New Second Level Link.
Create your link using the same steps as above.
If you would like to edit your link. click the pencil icon to re-open the editor.
The order of the links in the list dictates the order they will appear on your website menu. You can reorder the menu links by either using the 'drag and drop' function, or by using the blue arrows ⬆️⬇️.
Menu items that have been created but not currently in use can be found in the section Re-use other First/Second/Third Level Links. You can add a link to your menu by clicking the chain/link icon on the right side.
Adding your menu to your website
To add your menu to your website, go to the template (or page if you only want it on a singular page) you wish for it to appear on.
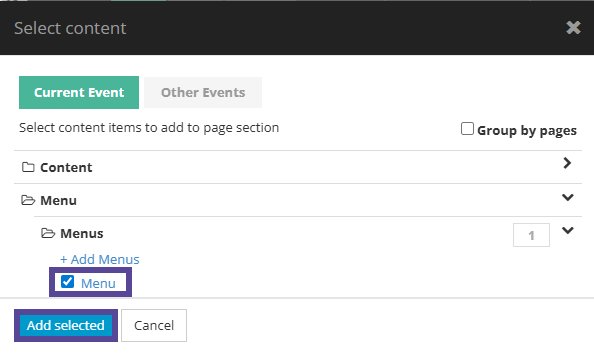
Choose where you want the menu to appear, and click +Add Content.
In the content window, select Menu >Menus, and tick the box beside your chosen menu. Then, click +Add Selected.
Remember to click Save at the end of your template.
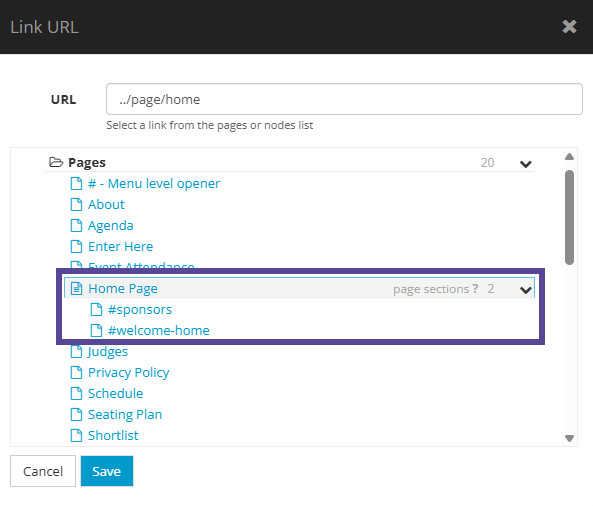
Linking to specific sections of a webpage
If you prefer, you can link to specific sections of your webpage, meaning the user will be brought directly to your chosen area of the page.
To create links to sections within your page, go to Website > Pages, choose your desired page, and simply add a Layout name in the section you want to link to.
Once you have added the layout name, click Save at the end of the page.
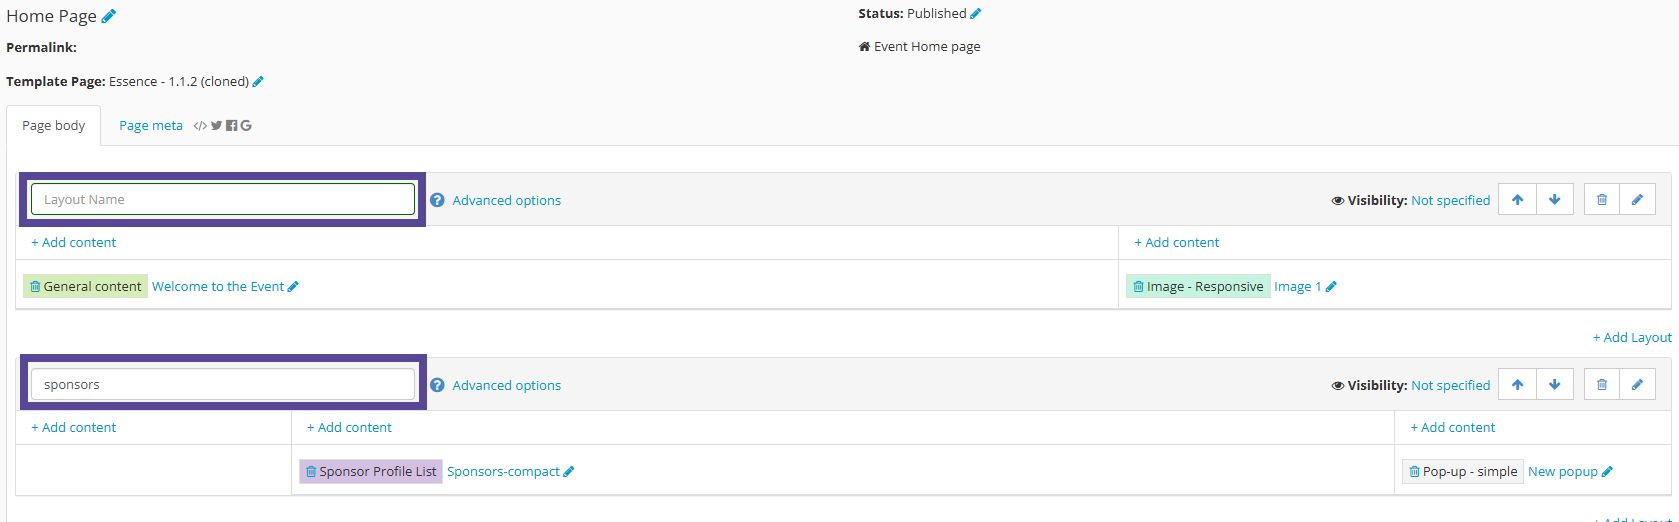
These named layouts become page sections which can be linked to.
You can now edit the menu to target the newly named page sections when choosing the page to link your menu item to.