How to archive an event
In this article
Archiving Your Event
To get started, enter the event you wish to archive, and navigate to Event > Settings.
Click Edit on the right side of the screen, and change the Status dropdown from Published to Archived.
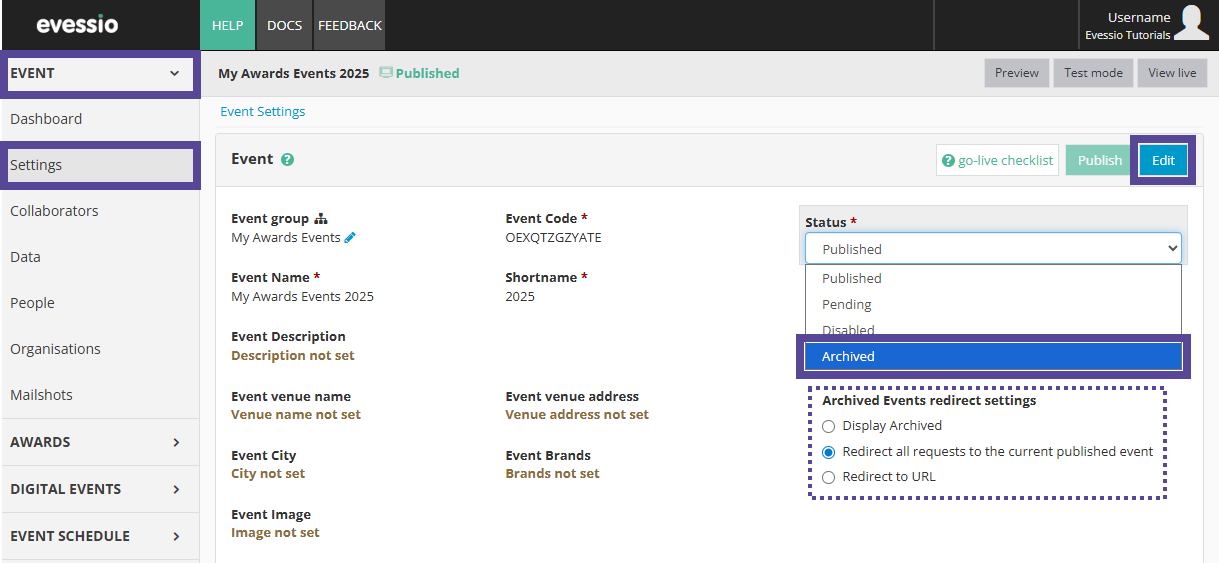
Then, select a redirect option.
| Redirect Option | Explanation |
|---|---|
| Display archived | If a user has saved or bookmarked pages, clicks on or searches for the specific URL for this event (including the short name) they can still access the archived page. |
| Redirect all requests to the current published event | If you have multiple event published at once within the event group they will be sent to the event your domain is set up to show or the landing pages where users can select the event they want to access. This will depend on the settings selected when setting up the custom domain (These settings can be changed at any time) |
| Redirect to URL | You can select any URL you would like visitors looking for the archived event to be redirected to. |
When you have made your selection, click Save.
Accessing your Archived Events
Once you have archived your event, you will still have access to it and will be able to access it at any time. However, it will no longer show on your event list's default view.
To view your archived events, go to your Event List. This is your default login page when you log into Evessio, and can also be access by clicking on the Evessio logo in the upper left corner.
Open the Status dropdown on the right hand side of the screen, and select to include your Archived events.
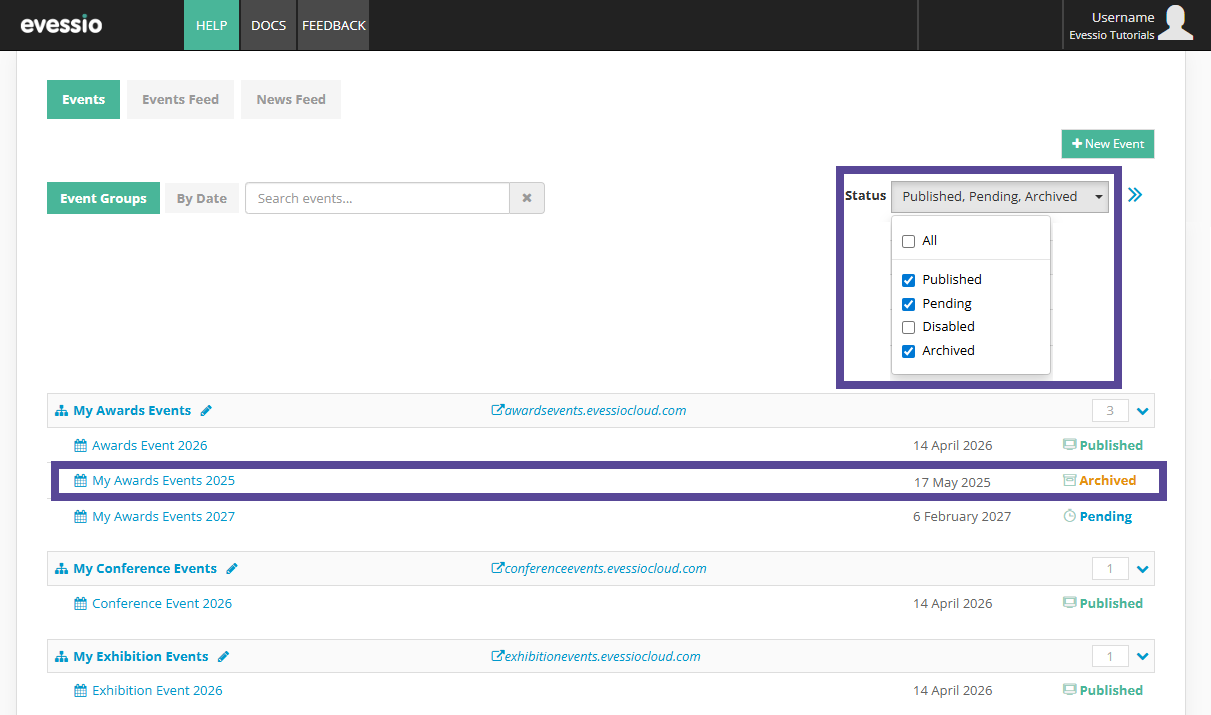
All archived events will now show on the list, and you can click on your event to access it.
To exclude archived events from the list follow the step above and untick the Archived option.