Reassigning a transaction
Any transaction can be re-assigned to a different user. This can be helpful when, as an event manager, you need to create a transaction on behalf of someone else.
Note 🗒️
Transactions only need to be reassigned if the user you want to own the transaction is not currently the transaction owner.
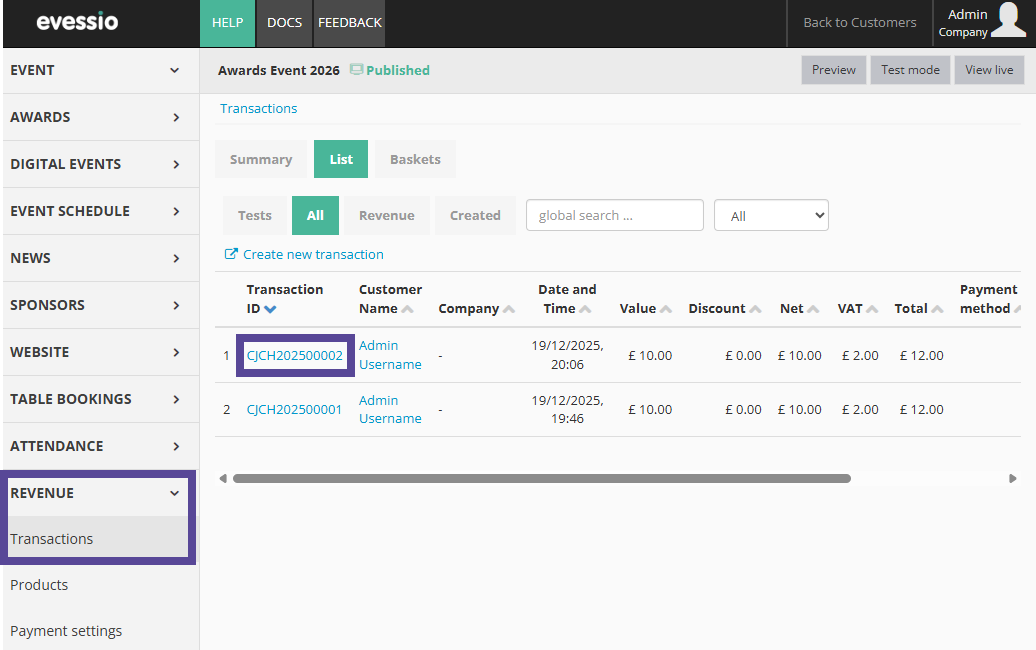
To begin, go to Revenue > Transactions > List > All.
Locate your transaction, and click on the Transaction ID.
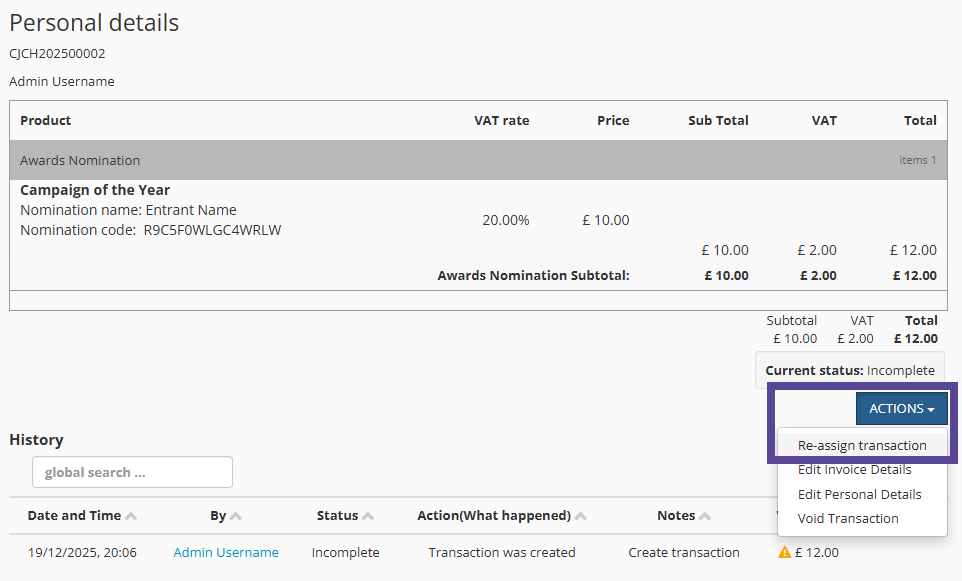
Once in the transaction, click on the blue Actions button on the right side of the screen. In the dropdown, select Re-assign transaction.
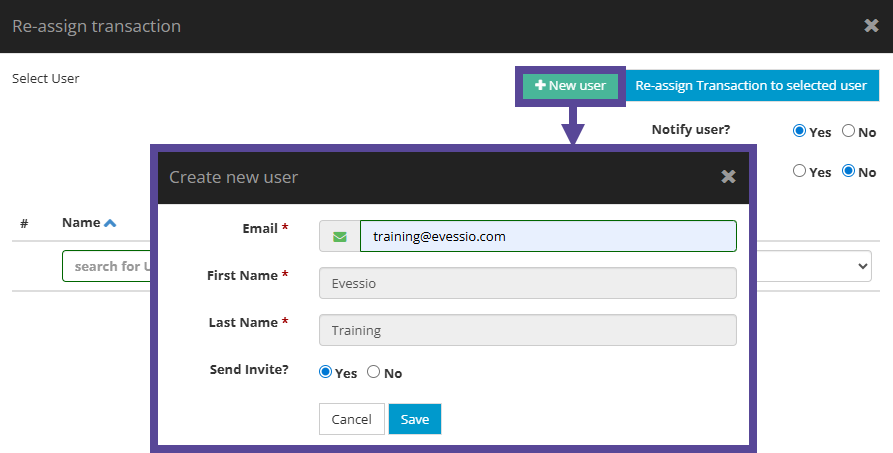
In the new window, select the user you wish to reassign this transaction to by selecting their name in the list. You can use the search function to find the user by their name or email address.
If the user you wish to reassign this transaction to is not on this list, you can create a new user.
To do this, click on +New User.
Complete the new user information, and choose if you will send the new user an invite.
When you are ready, click Save.
Once your user in listed in the table, select who you are reassigning the transaction to.
Then, choose if you wish to notify the user via email.
Tip 💡
You can edit the content of the notification email in Website > Email Templates > "Thank You- Reassign Transaction.
If this was a completed transaction, you can choose to attach the invoice/receipt on the notification email.
Finally, if there are any product attachments active on the product, you can choose to also attach these to the notification email.
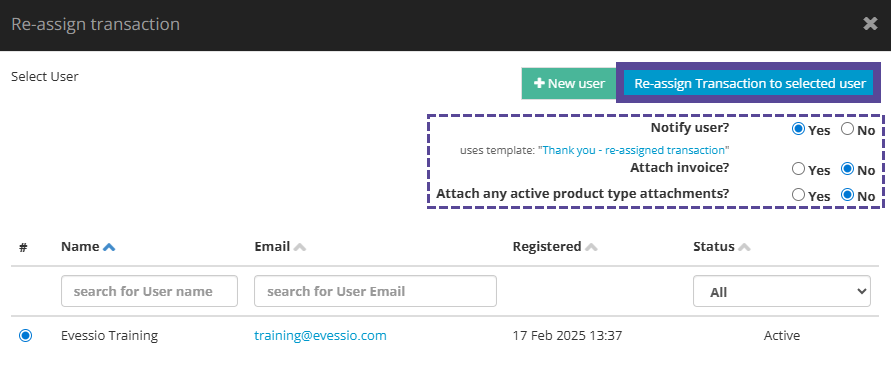
When you are ready, click Re-assign Transaction to selected user.
Your selected user will now be the owner of this transaction, and will be able to interact with and make edits to the submission or purchased product.