Using the Attendee Check In App
Here you will find a guide on using the Evessio Attendee Check In App, from accessing the app to checking in attendees in various ways.
In this article
Accessing and downloading the Evessio Attendee Check In App
To use the check-in function, you will need to first accept the email invitation to confirm your participation.
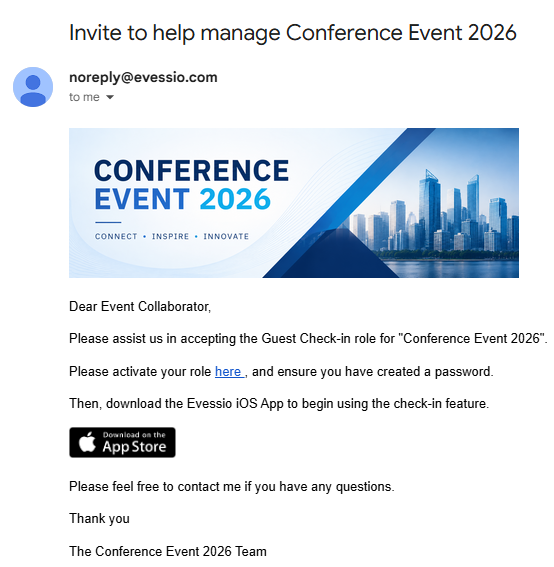
To complete the process, click on the invite link in the email, and accept/ confirm your role on the event website. If you do not already have an account, you will be prompted to create a password.

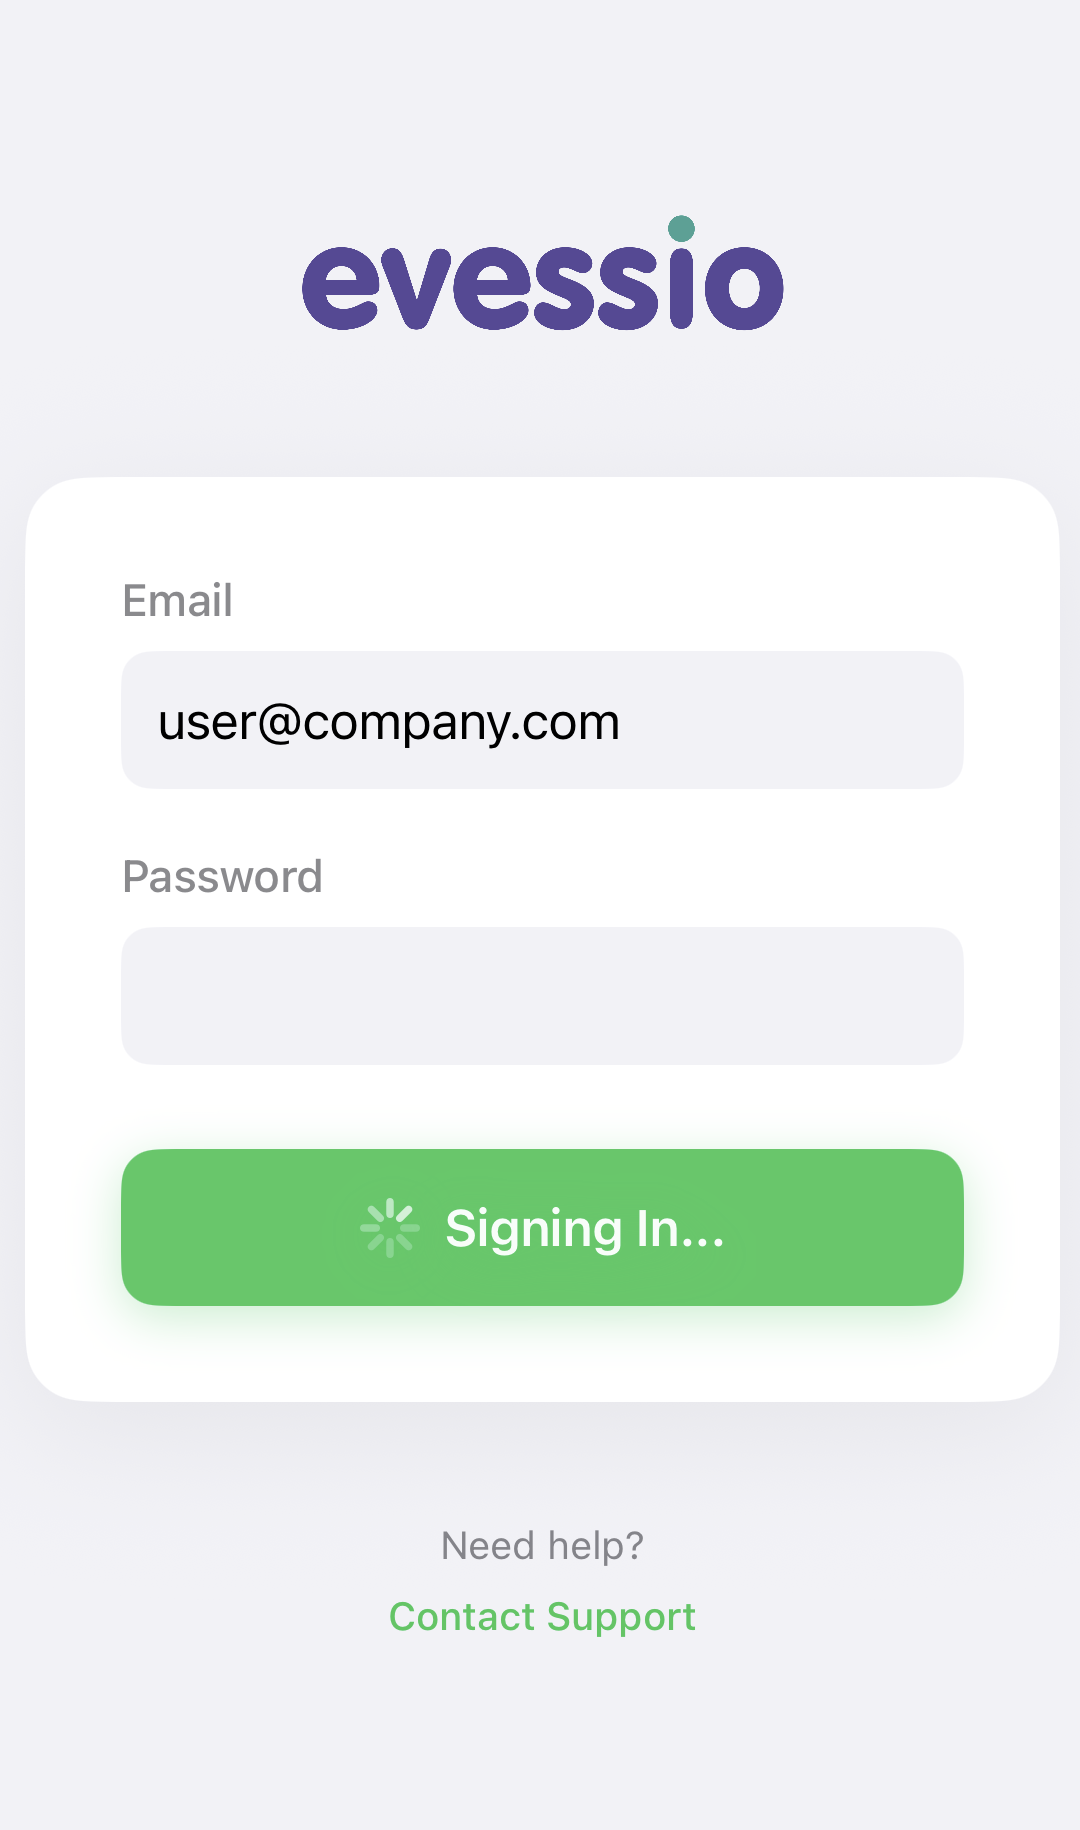
Once the role is confirmed, simply download the Evessio Check-in App from the iOS App Store, and log in using the same email address and password used on the website.


Note 🗒️
The Evessio Check in App is exclusively available on the Apple App store for use with iOS devices
Once logged in, you can choose between checking in via a list, or scanning the ticket's QR code.
Checking in/out via the attendee list
When you log into the app, you will see the event(s) that you have access to and will be able to check in/out guests from. Select the name of the event to access the attendee list.
Once you have accessed the attendee list, you can browse the attendee list, or you can use the 🔎 search function to find a specific attendee name.
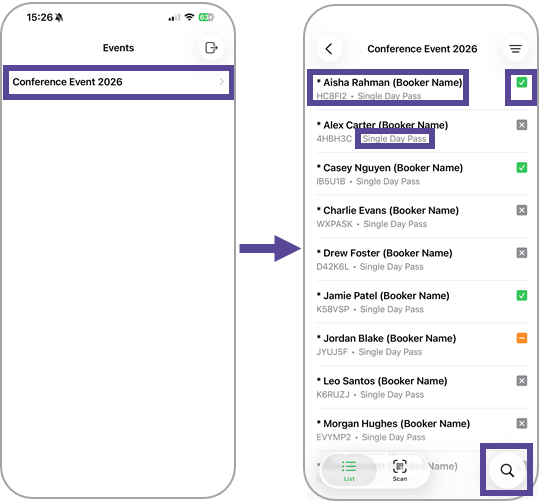
Attendees are listed alphabetically and will display both the attendee name and the customer /booker name.
You will also see the type of ticket assigned to the attendee.
To check in an attendee, simply press and hold the attendee's name to open the check-in options.
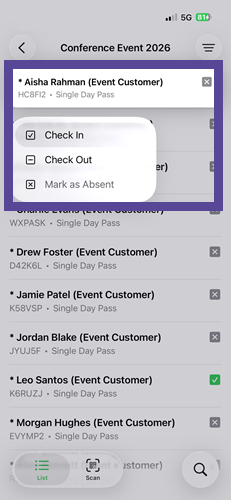
There are three different statuses available:
| ✔️ | Check In |
Selecting this option checks the attendee in. This symbol beside their name on the list shows they are checked in. |
| ➖ | Check Out |
Selecting this option checks the attendee out. This symbol beside their name on the list shows they are checked out. |
| ✖️ | Mark as Absent |
Selecting this option marks the attendee as absent (i.e. not at the event). This symbol beside their name on the list shows they have not attended or arrived. |
Checking in/out by scanning QR codes
To scan an attendee's QR code on their ticket, select the Scan option on the app.
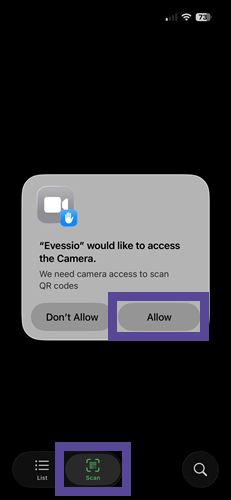
The first time this is selected, the app will request access to use your device's camera.
Select Allow to ensure you can scan QR codes.
Once an attendee presents their ticket with their QR code, simply use your device's camera to scan the code on their ticket.
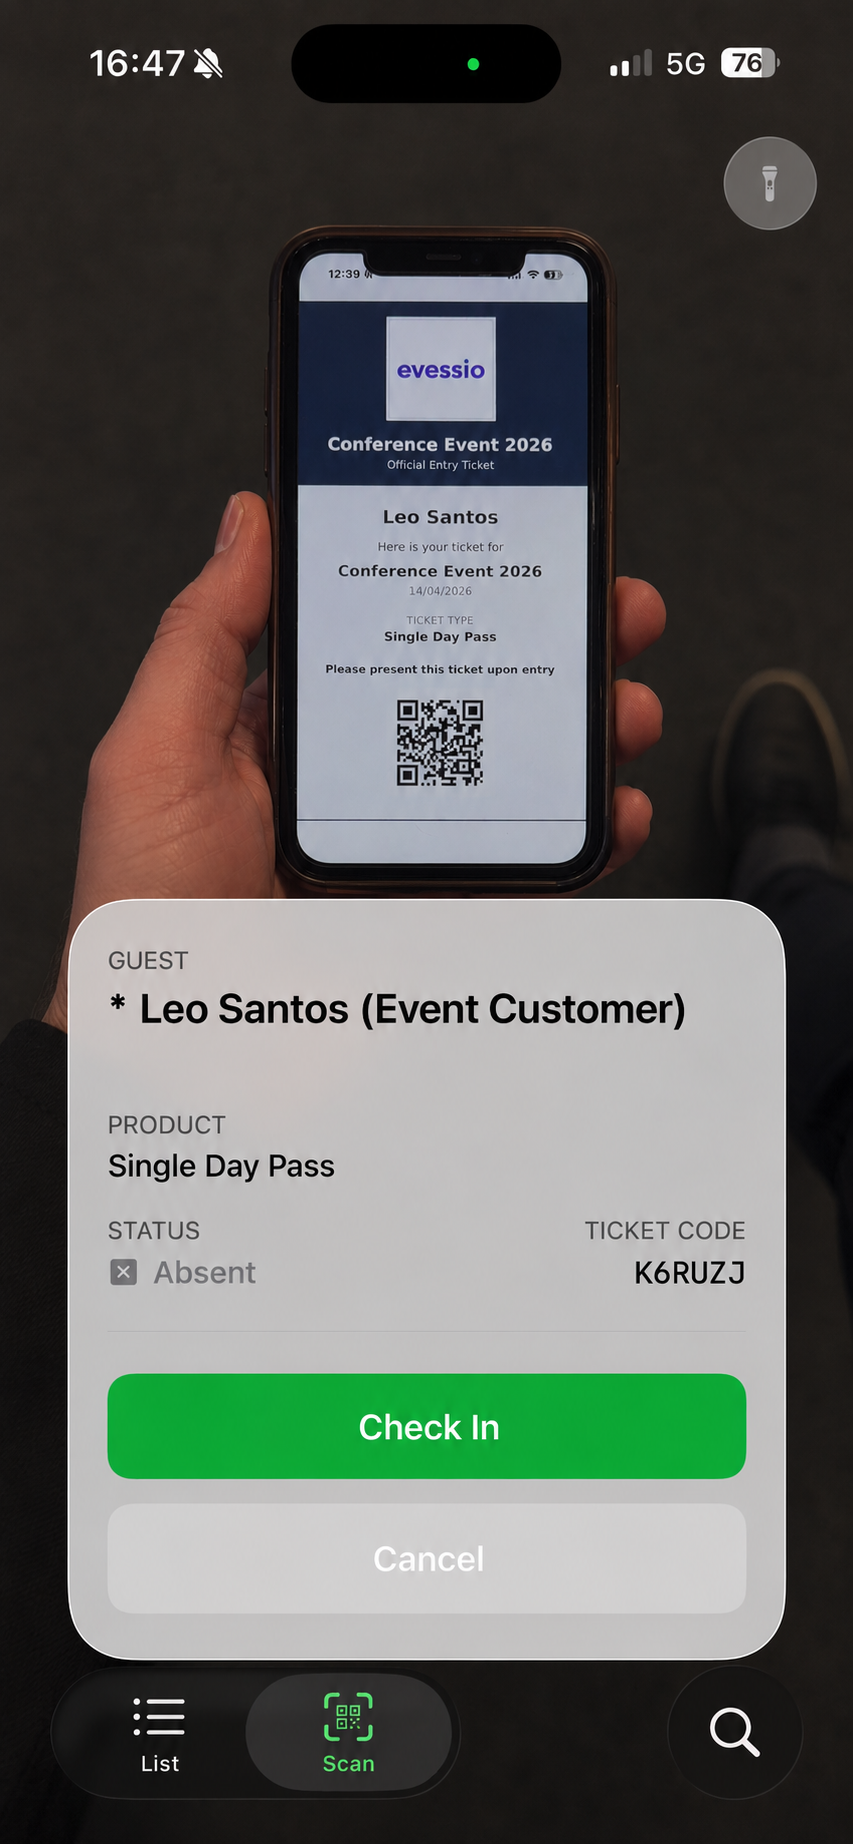
Once scanned, a pop up will appear confirming the attendee's name, the type of ticket they have, and the current status of the attendee.
To check the attendee in, select Check In. You can reverse the process and scan an already checked-in ticket to check out the attendee.