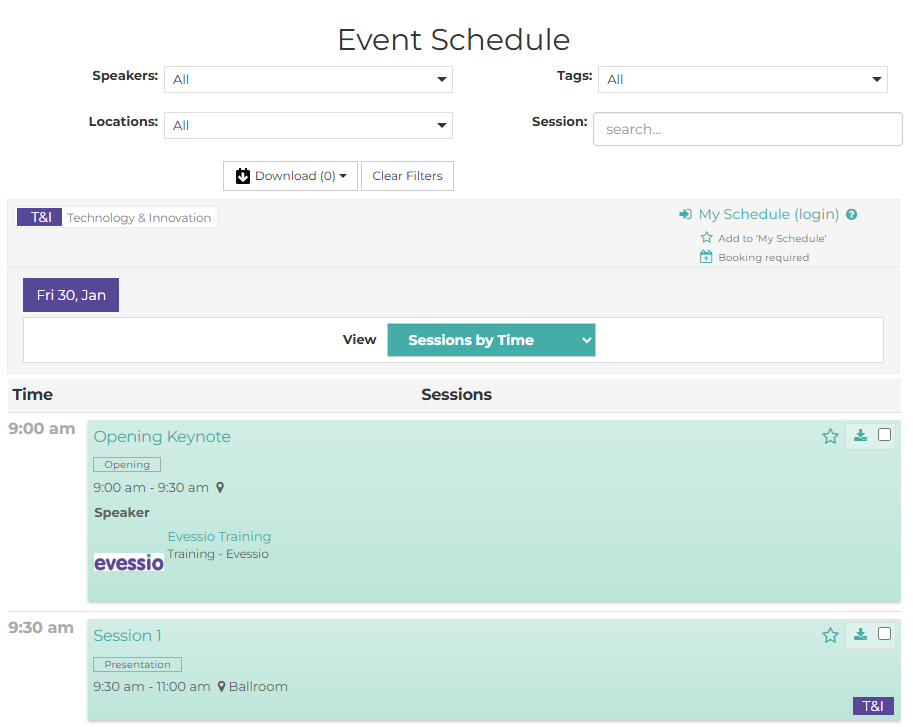
Event Schedules
Event Schedules are used to provide a breakdown of your event to your attendees.
Attendees can see the name and purpose of sessions, any speakers and/or sponsors, and save sessions to their calendar or create a personal schedule.
Sessions can be open or require booking, and capacity limits can be put on booked sessions.
📺For a video tutorial on Event Schedules, click here.
Note 🗒️
If you are looking for a more basic format for your event programme and do not require features such as pre-booking, capacity limits and concurrent sessions, you may prefer a Simple Agenda.
In this article
- Building your schedule assets (locations, topics, speakers, sponsors)
- Creating an agenda for your event schedule
- Adding sessions
- Adding your event schedule to your site
Building your schedule assets
In preparation for creating your event schedule, it is useful to prepare the other elements that will help build your schedule, such as locations, topics, speakers, sponsors and/or exhibitors.
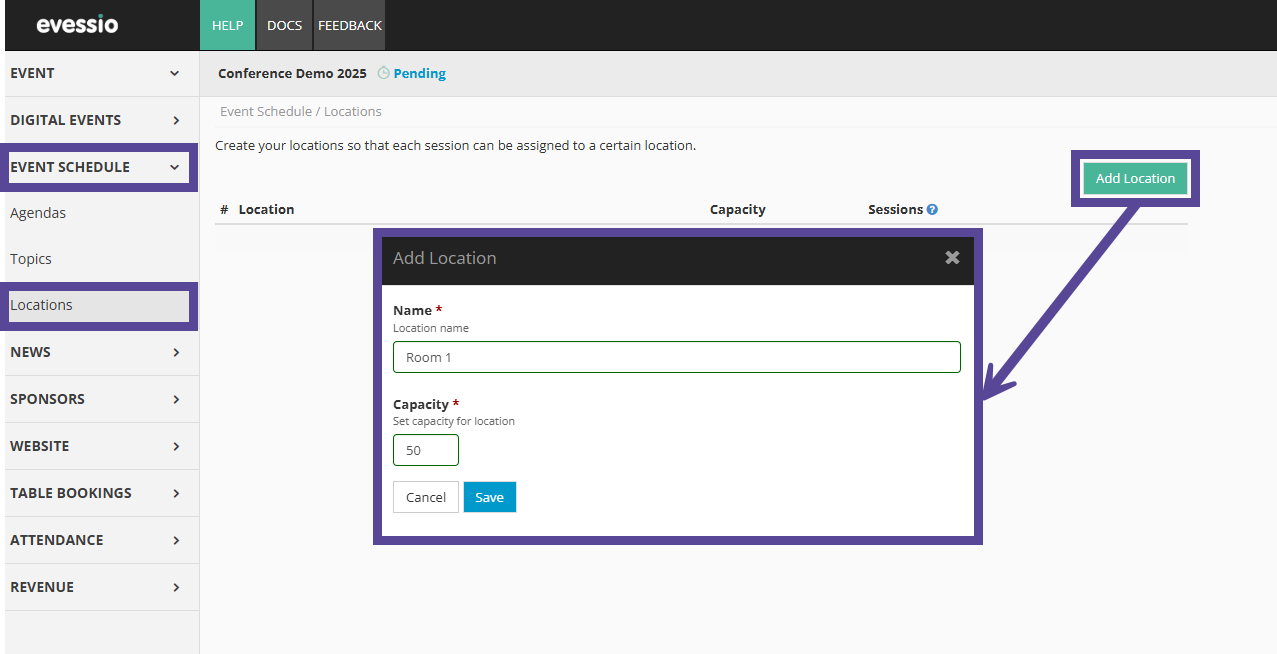
Locations
Adding locations allows you to include the physical place a session will take place. You can also add a capacity for your location, allowing for capacity limit if attendees need to book their place at the session.
To add a location, navigate to Event Schedule > Locations, and click +Add Location. Give your location a name and the capacity for your location, and click Save.
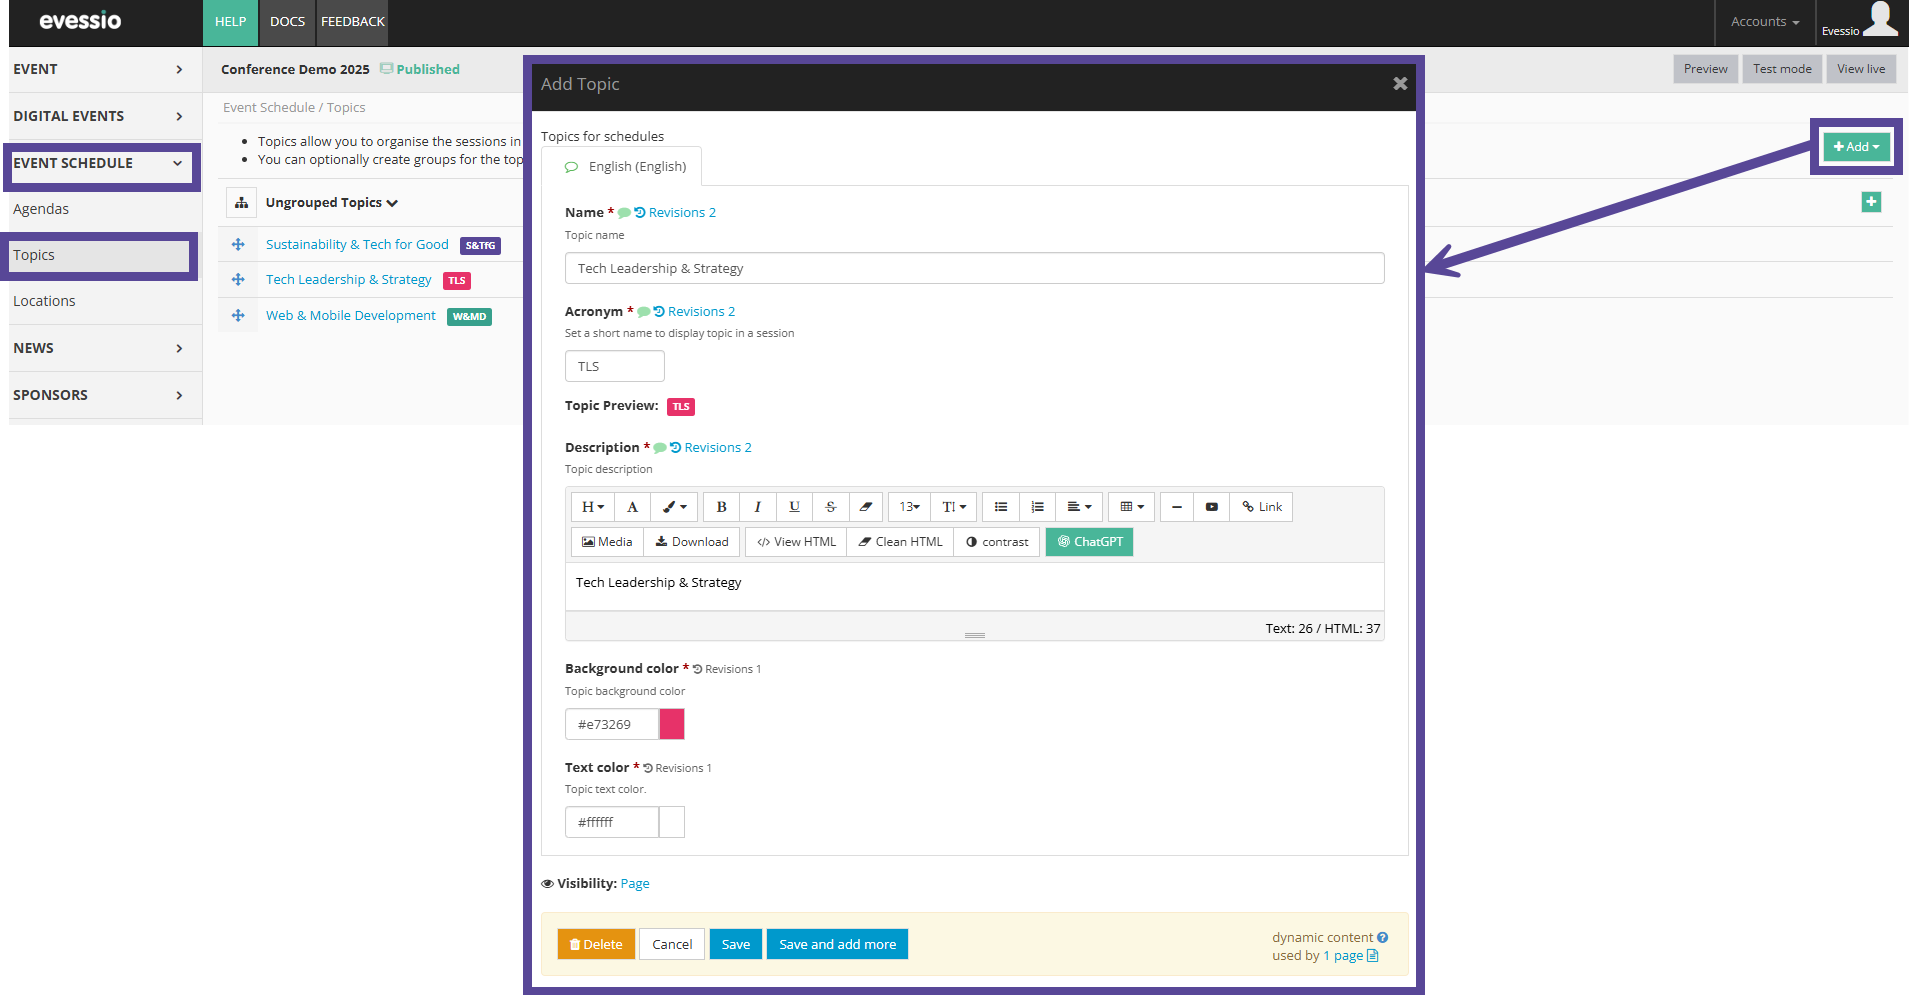
Topics
Topics allow you to organise the sessions in your event schedule. You can optionally create groups for the topics to further segment subject matter.
Tip 💡
If you prefer to use a different title for your topics on your schedule, such as tags or tracks, you can do so when configuring your event schedule on your website.
To add a topic, navigate to Event Schedule > Topics, and click +Add.
Provide a name for your topic. The system will suggest an acronym based on your topic name, however this can be edited as desired.
Add an optional description, then choose the background colour and text colour for your topic tag. Once you are ready, click Save.
Speakers
If you have already added speakers as collaborators, you will be able to add them to the sessions they will appear in, even providing access to them to manage the session details.
Note 🗒️
To read more information on setting up your speakers, click here.
Sponsors
Once sponsors have been created within your event, they will be available to include in your sessions.
Note 🗒️
You can read more about creating sponsors here.
Exhibitors
If you have created exhibitors within your event, you can connect exhibitors to sessions on your agenda.
Note 🗒️
You can read more about exhibitors here.
Creating agendas for your event schedule
To create an agenda for your event schedule, navigate to Event Schedule > Agendas, and click on +Add Agenda. In the pop up, provide a name and determine a session colour for your agenda.
Then, choose the date for your agenda, providing an optional name (e.g. day one), and the start time.
If you would like to add multiple days to your schedule, use the green + button to add more date lines.
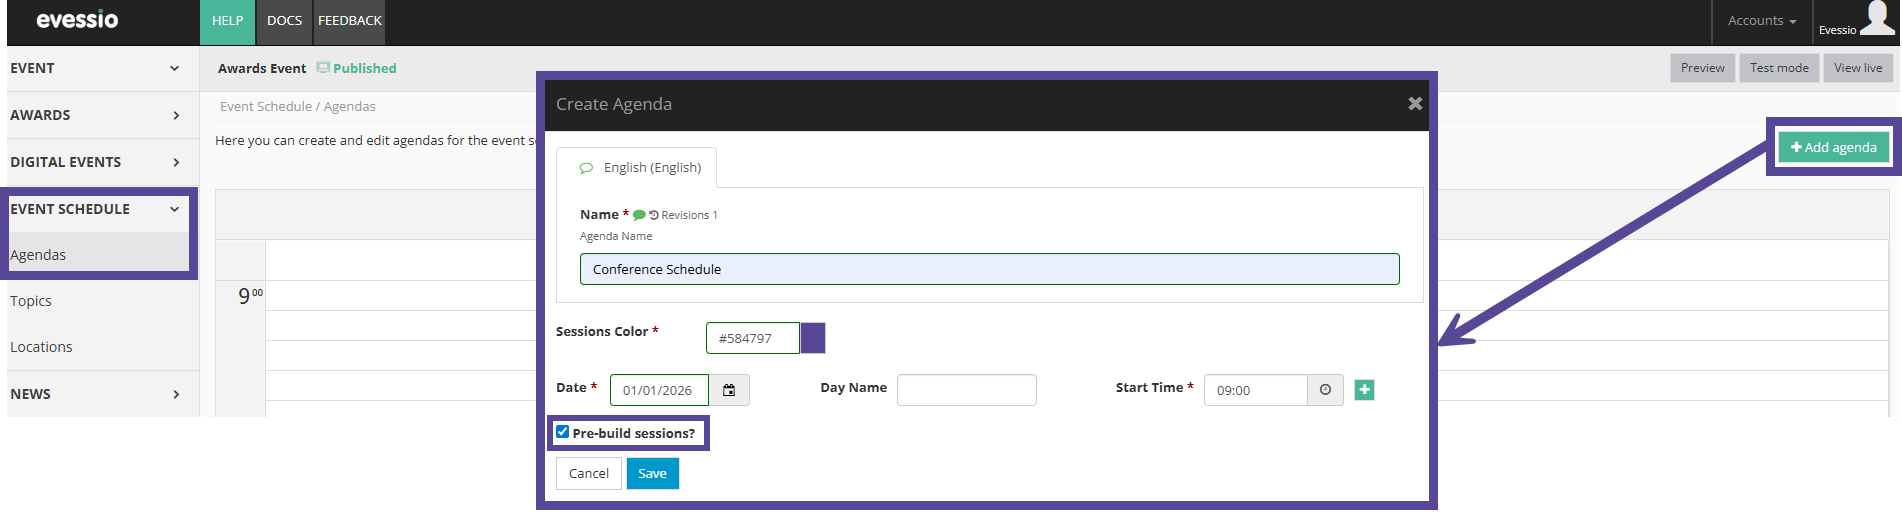
Finally, you can choose if you would like to pre-build the sessions, using the Evessio Session Builder.
Tip 💡
If you do not choose to pre build sessions at the time of creating your agenda, you can still activate this function later.
Once you have completed the required information, click Save.
Adding sessions
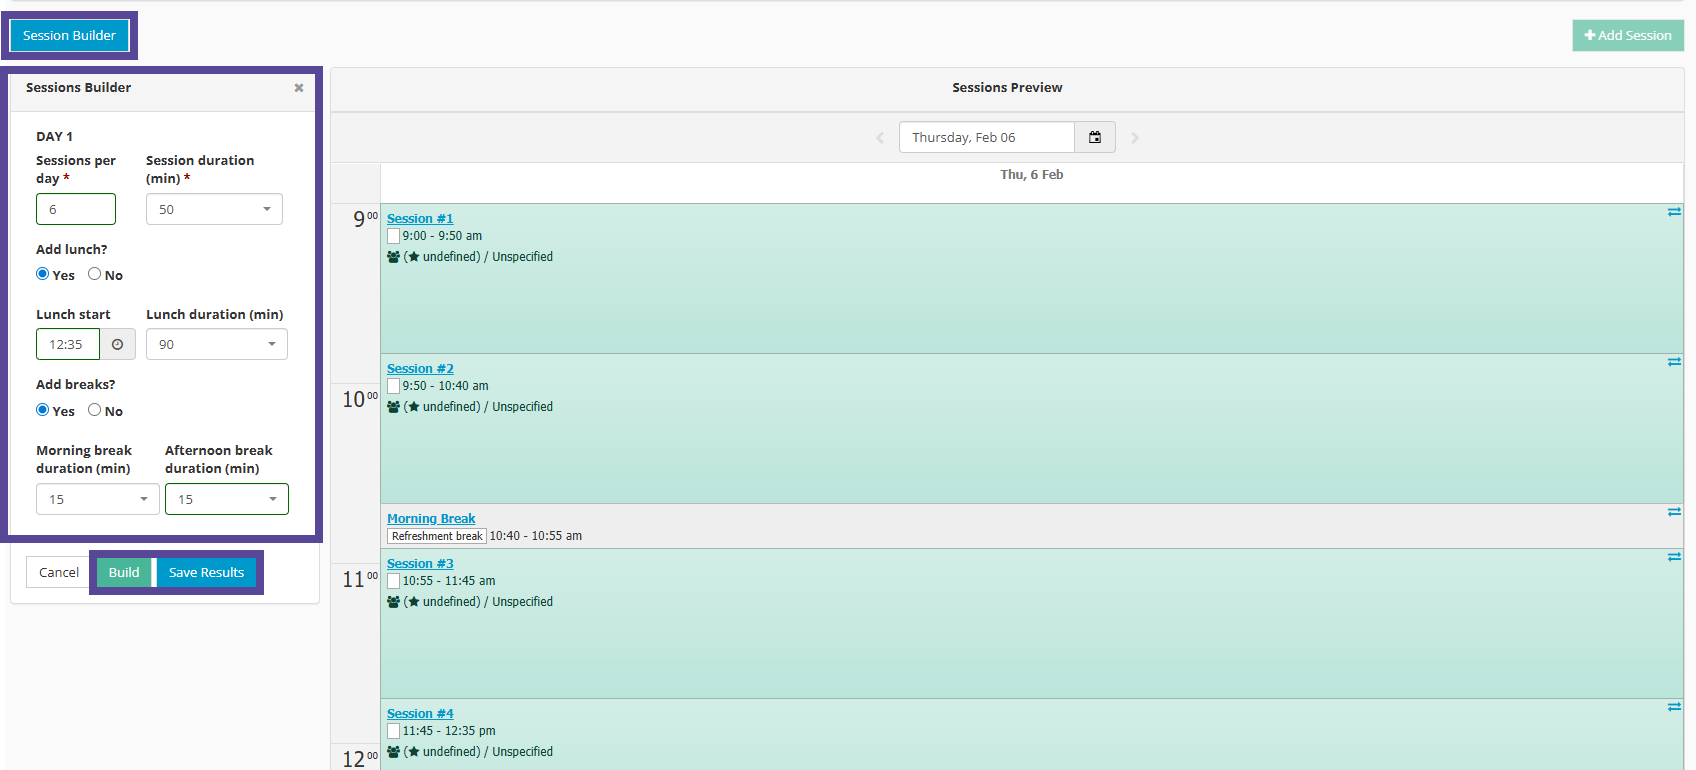
Using the Evessio Session Builder
You can use the Evessio Session Builder to pre-build your sessions.
Simply insert the number and length of your session(s), and if you would like to include lunch and breaks.
Once you have inserted your chosen setup, click Build. The sessions will appear in the sessions preview window. If you are happy with the sessions that have been generated, click Save Results.
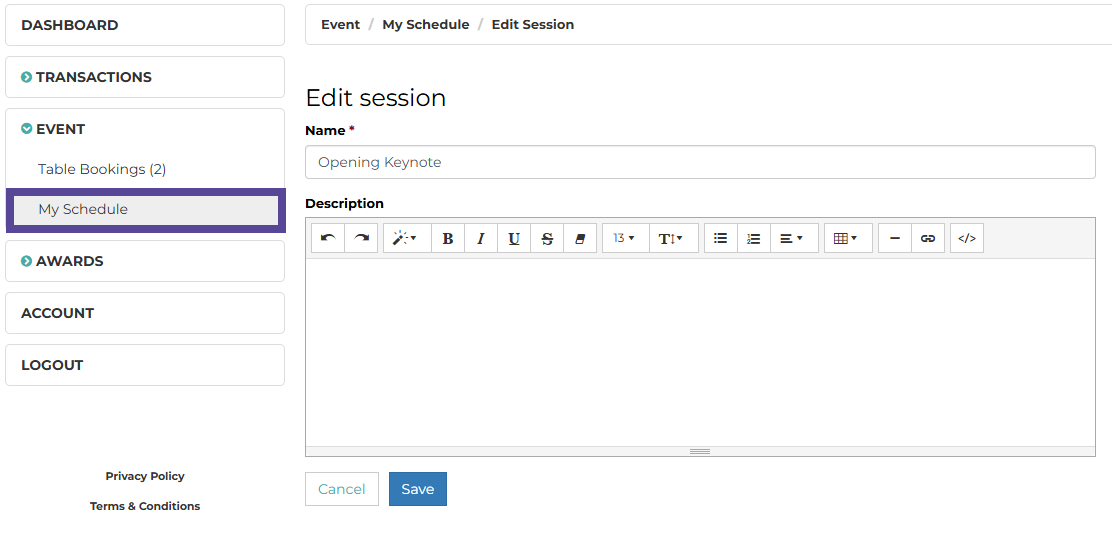
To edit the session details, click on the session name to open the configuration window.
Building and configuring sessions
To add a single session, click on the +Add Session button
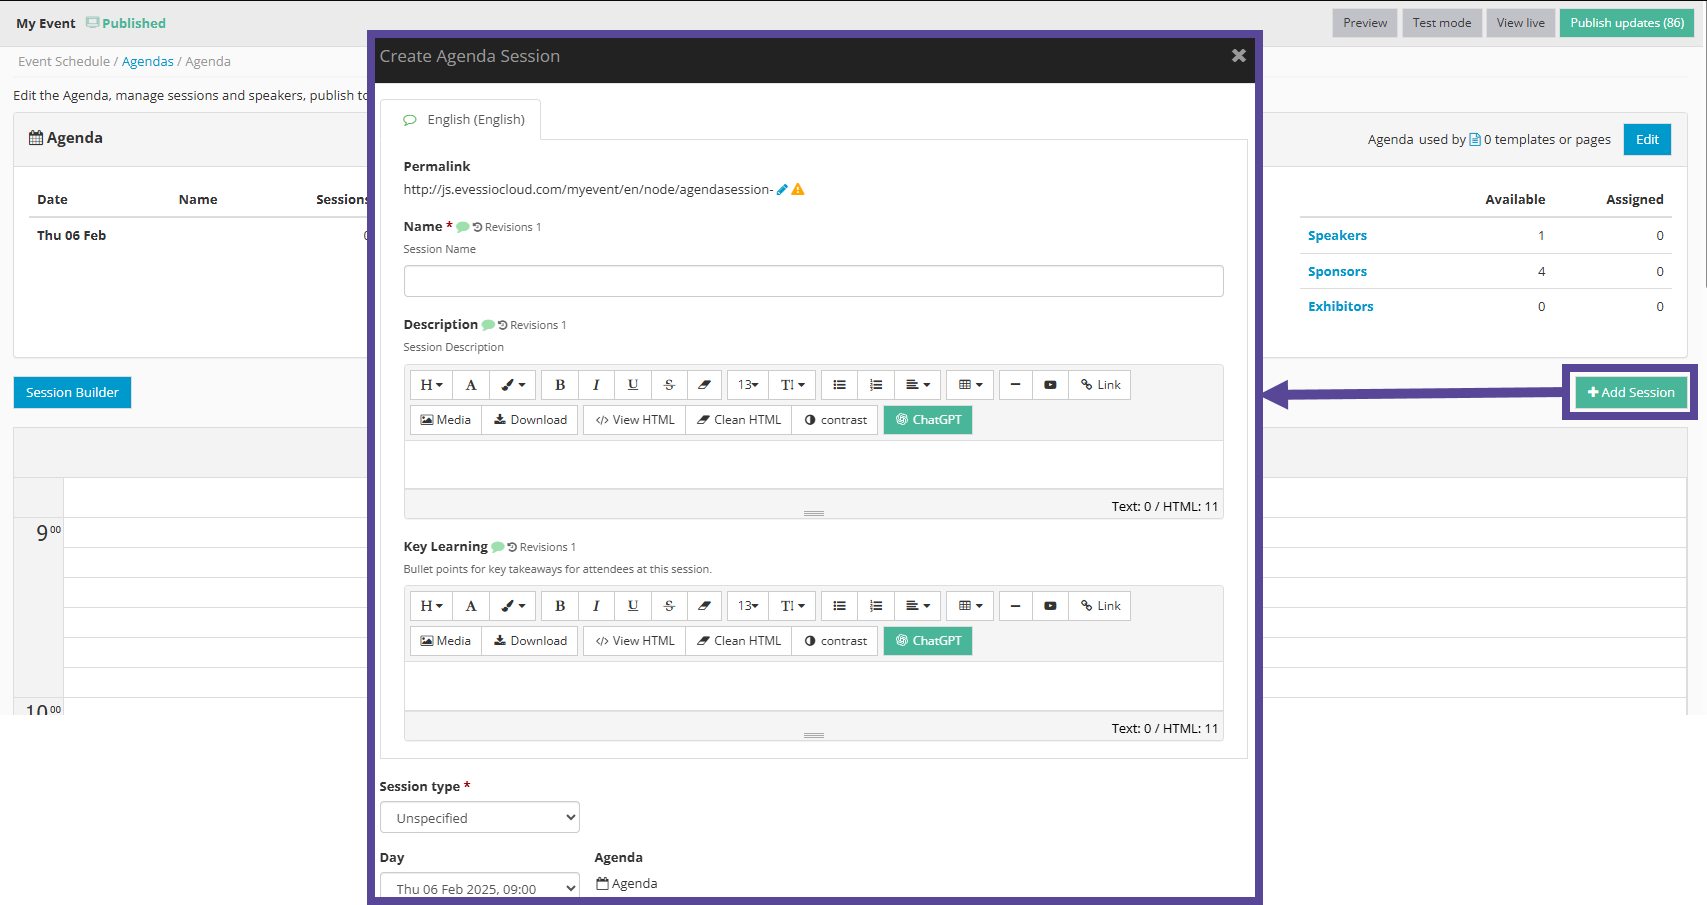
Give your session a name and optional description and key learnings.
Then, select your session type.
Determine which day of your agenda your session will take place, and the start and end time of your session.
Next, choose the topic(s) and location you want to assign to this session.
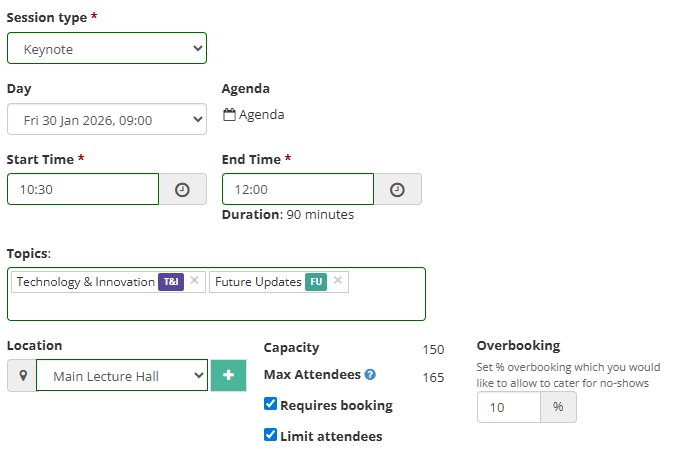
When you select your location, you can choose if your session requires booking. Then, decide whether to limit attendees, and if overbooking (based on the capacity determined when creating the location) is allowed.
Note 🗒️
You can limit the number of participants who will be allowed to book a session. Booking will close when the defined number of Max Attendees is reached.
You can add any collaborators to the session as speakers, sponsors and exhibitors.
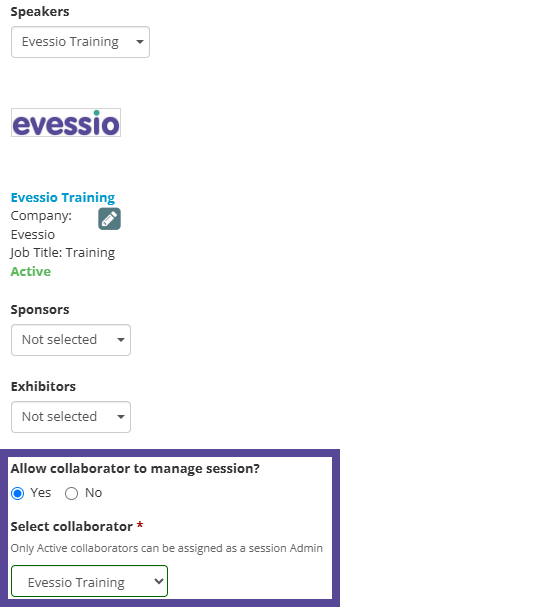
You can choose someone from your collaborators to be able to manage the session. Once a collaborator has been assigned to a session, they will be able to make changes to the name and description of the session once logged into your event website.
Finally, you can configure your session to send notifications to collaborators or attendees.
Notifications will be sent for sessions that are on a published schedule.
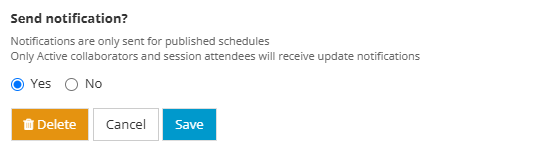
Tip 💡
For your event schedule to be considered Published, it must first be added to your website.
Adding your event schedule to your site
Once you have created your required sessions, you can add your agenda to your site as an event schedule.
Here, you can also configure more details, such as time zone, display information, and personal schedule configuration.
Note 🗒️
Click here to learn more about adding your event schedule to your site